|


This article
was published in the January-February 2004 issue of N Scale Railroading
magazine. Although the project is an N Scale project, the modeling principles
apply to all scales.
Good-looking loads for flatcars often challenge
our modeling skills. Sometimes you can spend more time fashioning a model to go
on the flatcar than you would if you had built the whole flatcar from scratch.
Often the load dates the modeling era. Wouldn’t it be nice if you could find a
way to have a great looking generic load without all that detailed modeling
effort? If you have some bulkhead flats, the answer may be just a pair of
pruning shears away. You can have a realistic looking load like this with just a
very little effort.

Bulkhead flatcars commonly carry
pulpwood today just as they did in prior years. Although much is now hauled out
of the woods by truck, there are still places in the country that use rail
service to move large quantities of pulpwood from railhead collection points to
large paper mills. When combined with kaolin tank cars and woodchip cars these
loaded bulkhead flats make a neat modern consist. This project is easy and can
be interrupted so it does not require your undivided attention for a long time
to get it finished.
The trick to making it easy is to
use real plant products to represent the wood. Take a close look at the
shrubbery around your house or in your neighborhood. Many varieties have
reasonably long, straight stems that are just the right diameter to represent N
Scale logs. Remember that pulpwood is usually made up of logs that are either
too small in diameter, short in length, or crooked in stature to be used for
lumber. We are looking for stuff 24 scale inches in diameter or less – that is
between 1/16 and 1/8 inch in N Scale. In my neck of the woods, azaleas do just
great.
After checking with the chief
horticulturalist at your house, do some judicious pruning of your chosen target.
You are looking for fairly straight 4 to 6 inch stems. It will take quite a few,
but you had to prune the shrubs anyway, didn’t you? The next step involves
trimming the trimmings to remove all the foliage and small nuisance twigs. After
you do this, you should put them aside for a couple of weeks to let them dry out
completely. Besides, the weather is nice and you still have the gutters to clean
and the grass to cut!
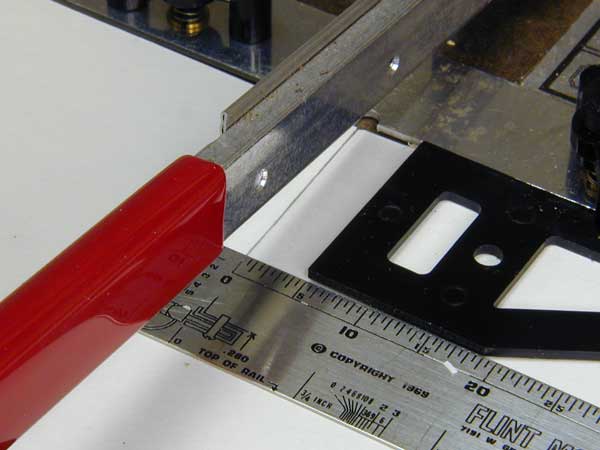
After the twigs have
dried out, set your favorite chopping tool to produce logs that are 5 scale feet
long as shown here.
Then put a long, boring tape in
the VCR and settle in for some parallel processing. The idea is to make really
small sticks out of little sticks. Just keep cutting away until you have a nice
pile of assorted diameters of 5-foot long pulpwood logs. The routine goes like
this: chop-chop, cheeto, chop-chop, cheeto, drink, chop-chop, cheeto, etc.
Repeat until either you run out of twigs, cheetos, or the movie ends. The
process and results are shown below.
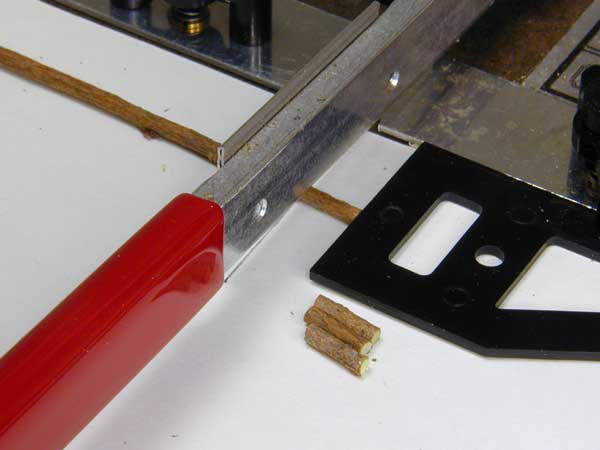
You get the best
results by cutting each log individually. Be careful and keep your fingers out
from underneath the cutting blade. Use the uncut twig to clear under the blade.
By the way, you get the best results just doing one log at a time. Trying to do
more at once will produce uneven and sometimes unpredictable results.
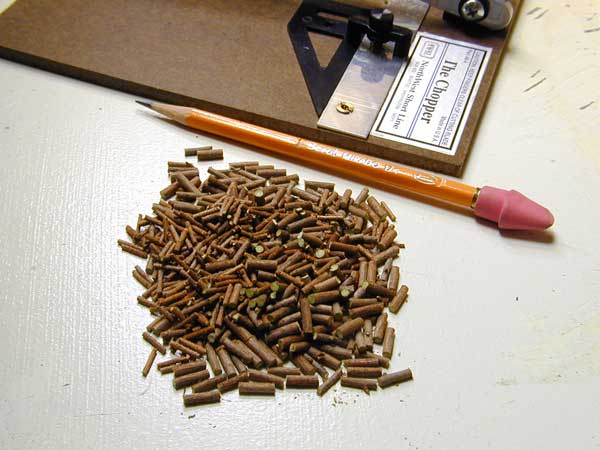
When you are finished cutting, you will have a pile of logs about this size.
This is about the right amount for one N Scale 50-foot bulkhead flatcar. You can now bag the results and
put them aside for your next modeling session. No need to inventory, categorize,
or carefully stow away the partially finished model, even though you are half
way through.
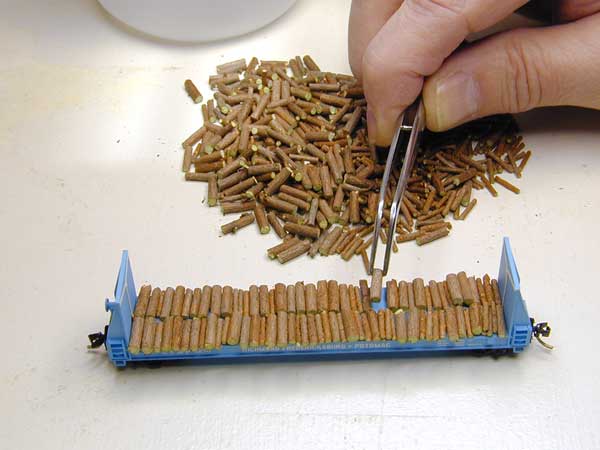
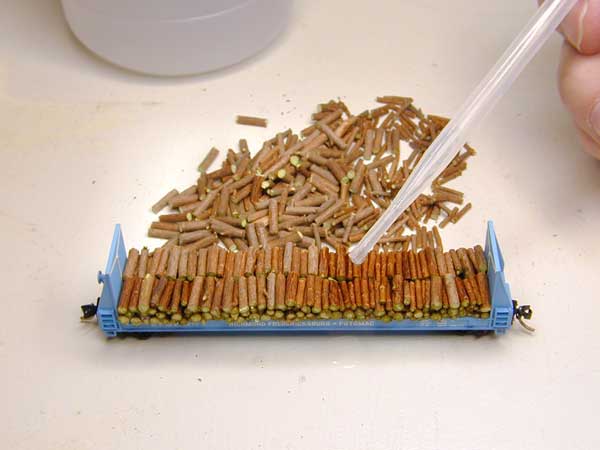
For the next modeling session, we will use a
Walthers pulpwood flat, although any bulkhead flatcar without center beam will
do. Arrange the pulpwood logs in two rows running across the beam in one layer
that covers the bottom of the flatcar as shown in the left photo below. Do not
try to get the same diameter logs next to each other. The idea is to try to have
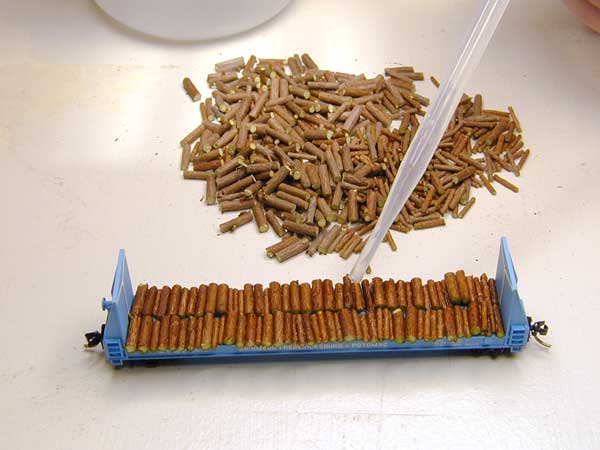
a random load, so just use what you pick off the pile. When this first layer is
complete, use an eyedropper to drip a small amount of isopropyl alcohol on the
logs as seen in the right photo below. This acts as a wetting agent for the glue
without floating the logs off the deck.
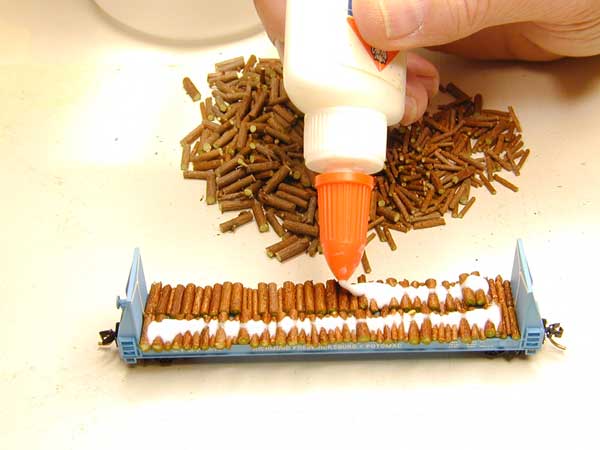
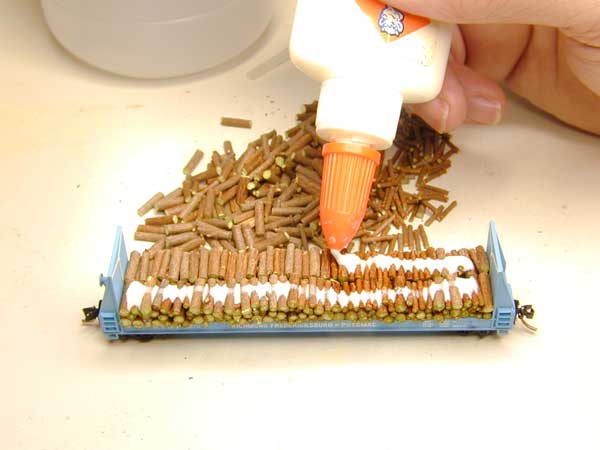
Next, apply a bead of white glue straight out of the
squeeze bottle along the top of each row of logs in the left photo below. While
that glue is still wet, apply the next layer of logs on top of the glue bead as
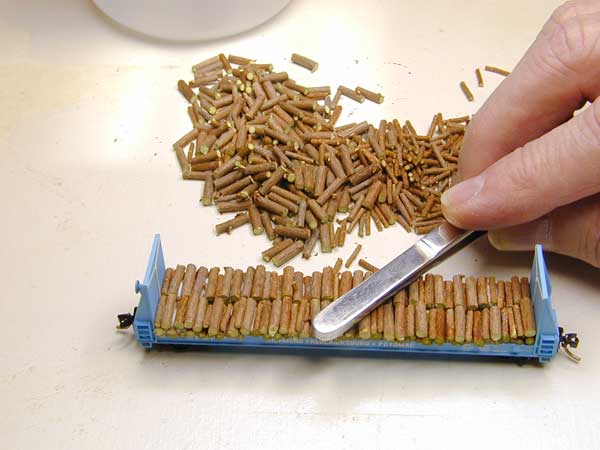
shown in the center photo below. If you drop them into place instead of trying
to seat each one firmly, you will have better results. A gentle pat with the
flat edge of the tweezers after the layer is in place will help seat them, but
do not be too firm with this as shown in the right photo below. Also, you want
to make sure that the logs are fairly even along the outside edges and the flat
end of the tweezers is just right for a gentle nudge to get that accomplished.
Now you have a choice. You can stop and move on
to something else while the first two layers dry. Or, you can continue adding
layers of logs and glue until the car is filled almost to the top of the
bulkheads. When you do the third and subsequent odd layers, you will not have to
put down a bead of glue first because the glue underneath the even layers holds
them in place. Just remember to use a little isopropyl alcohol each time you add
the glue and that will weld the whole load together.
After
placing the third layer on the car, you repeat the process of
wetting with alcohol and apply the two beads of glue. Then comes the
fourth layer. Repeat the process until the car is full. Remember,
you only need glue between alternate layers, not every time.
If you see large gaps that do not look just right in the
side of the load when you are finished, simply find a log that will fill the
hole, dip it in glue, and slide it in. After the last course of logs is in
place, use a little 50/50 diluted acrylic matte medium over the top layer. This
will help to hold them in place without giving that “gloppy”, shiny look that
full strength white glue sometimes gives.
One variation that I have not tried, but should
work just fine, is to line the deck and ends of the bulkhead flat with plastic
wrap or waxed paper before building the load. That way, you can build the load
to precisely fit the car as described above, but it will be removable. Of
course, you take the lining off the load after it dries. You can then use a
little bit of moveable glue to hold the load in place.
There you have it. Great looking loads that are
realistic, cost next to nothing, and get one of those gardening honey-do’s off
your list.
|